






DOCUMENTATION

Digital Signage Manager

Create. Schedule. Verify.


DIGITAL SIGNAGE OPERATIONS

Digital Signage Manager

Create a TV, add approved artwork, control schedules and timing, and verify the public display before it goes live.

For: U.S. Air Force marketing departments

Guide at a glance

Use the workflow phases below while you work in TV Manager.

  • 11 guided operator procedures
  • 3 timing controls explained
  • A final preview and publishing check

Choose your path

Start with the outcome you need. Each path leads to a short, verifiable procedure.

Before you edit

Match the TV number, name, and public URL before editing. When finished, use Preview and confirm the visibility status, artwork, schedule, and timing.

OPERATOR WORKFLOW

Core tasks

Work from setup to verification, or open only the procedure that matches your task. Every procedure ends with a result you can check.

01 / BUILD

Create & populate

Set up the TV and add approved artwork from the right source.

Procedures 1–4
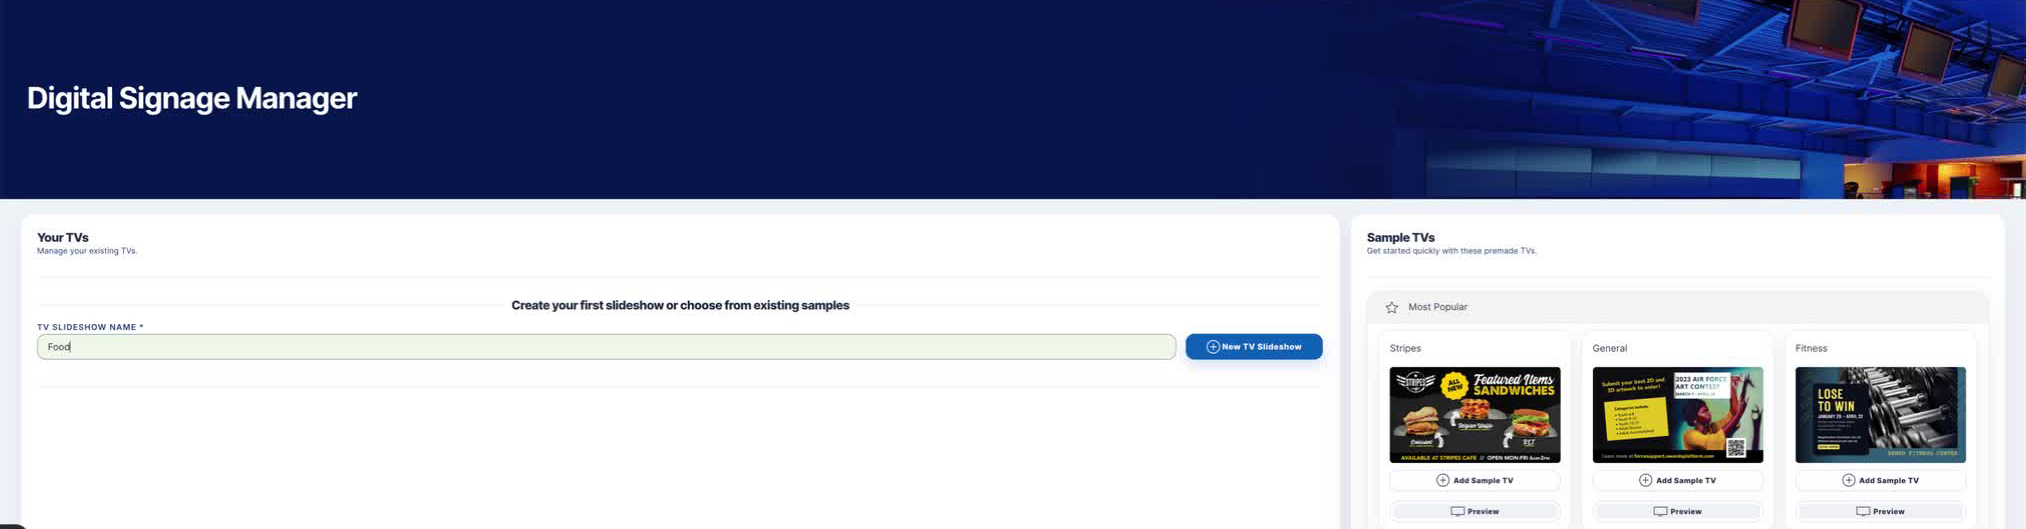
1. Create a blank TV
TV Manager showing the new TV name field and available sample TVs

Use this when: You want a new, empty TV and will add the slides yourself.

  1. Open TV Manager.
  2. If the name field is hidden, select Create New TV.
  3. Enter a clear name in TV Slideshow Name.
  4. Select New TV Slideshow.
  5. Open the new TV and add its content.

Expected result: A TV card appears with a unique TV number, name, public URL, Configure count, Preview, Copy, and Delete controls.

2. Start from a sample TV
Sample TV cards with Preview and Add Sample TV controls

Use this when: An approved sample is close to the content you need.

  1. In Sample TVs, find a suitable category.
  2. Optionally select Preview to review it first.
  3. Select Add Sample TV.
  4. Locate the copied TV under Your TVs.
  5. Rename it and remove or replace any slides that do not apply.

Expected result: A new TV with its own number and public URL contains a copy of the sample slides. Editing the copy does not change the sample.
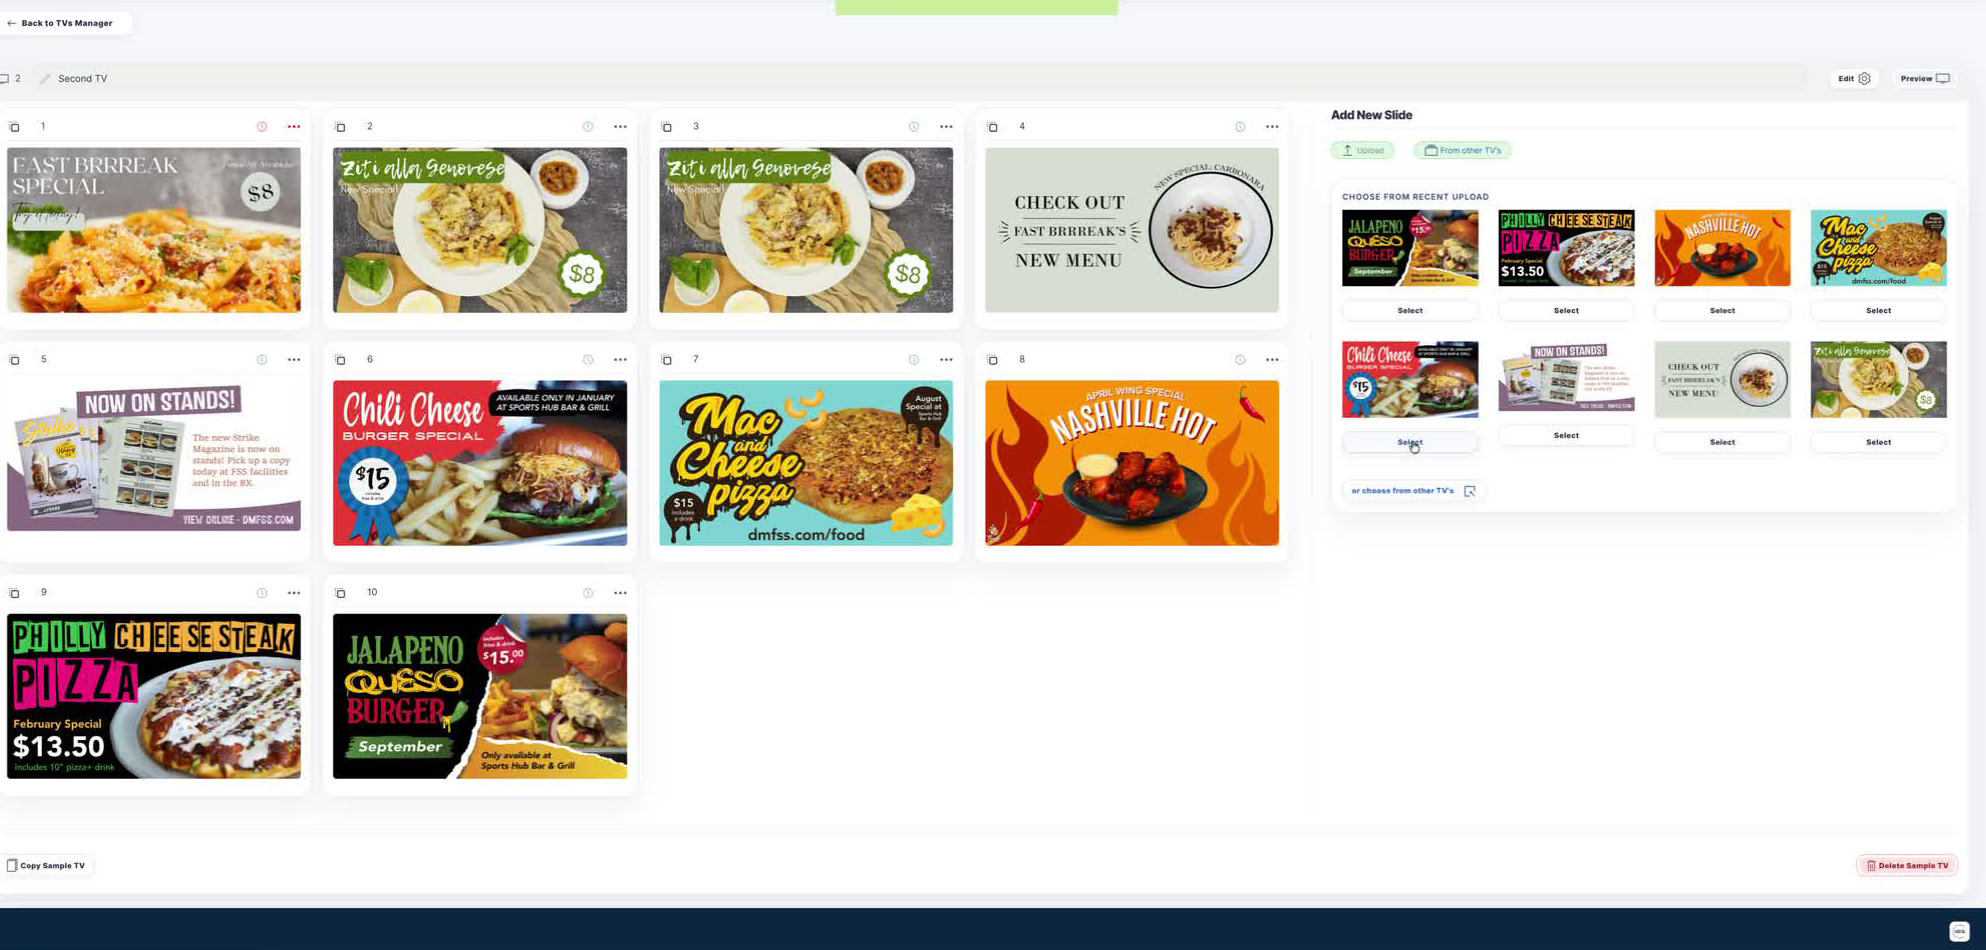
3. Upload or reuse recent artwork
Add New Slide area showing recently uploaded artwork

Purpose: Add approved artwork to the selected TV.

  1. On the TV card, select Configure.
  2. In Add New Slide, upload a file or drag and drop it into the upload area.
  3. To reuse recent artwork, open the recent-upload choices and select the image.
  4. Wait for Applying changes or Saved to finish before continuing.

Expected result: Every selected image appears as a numbered slide card and the Configure count increases.
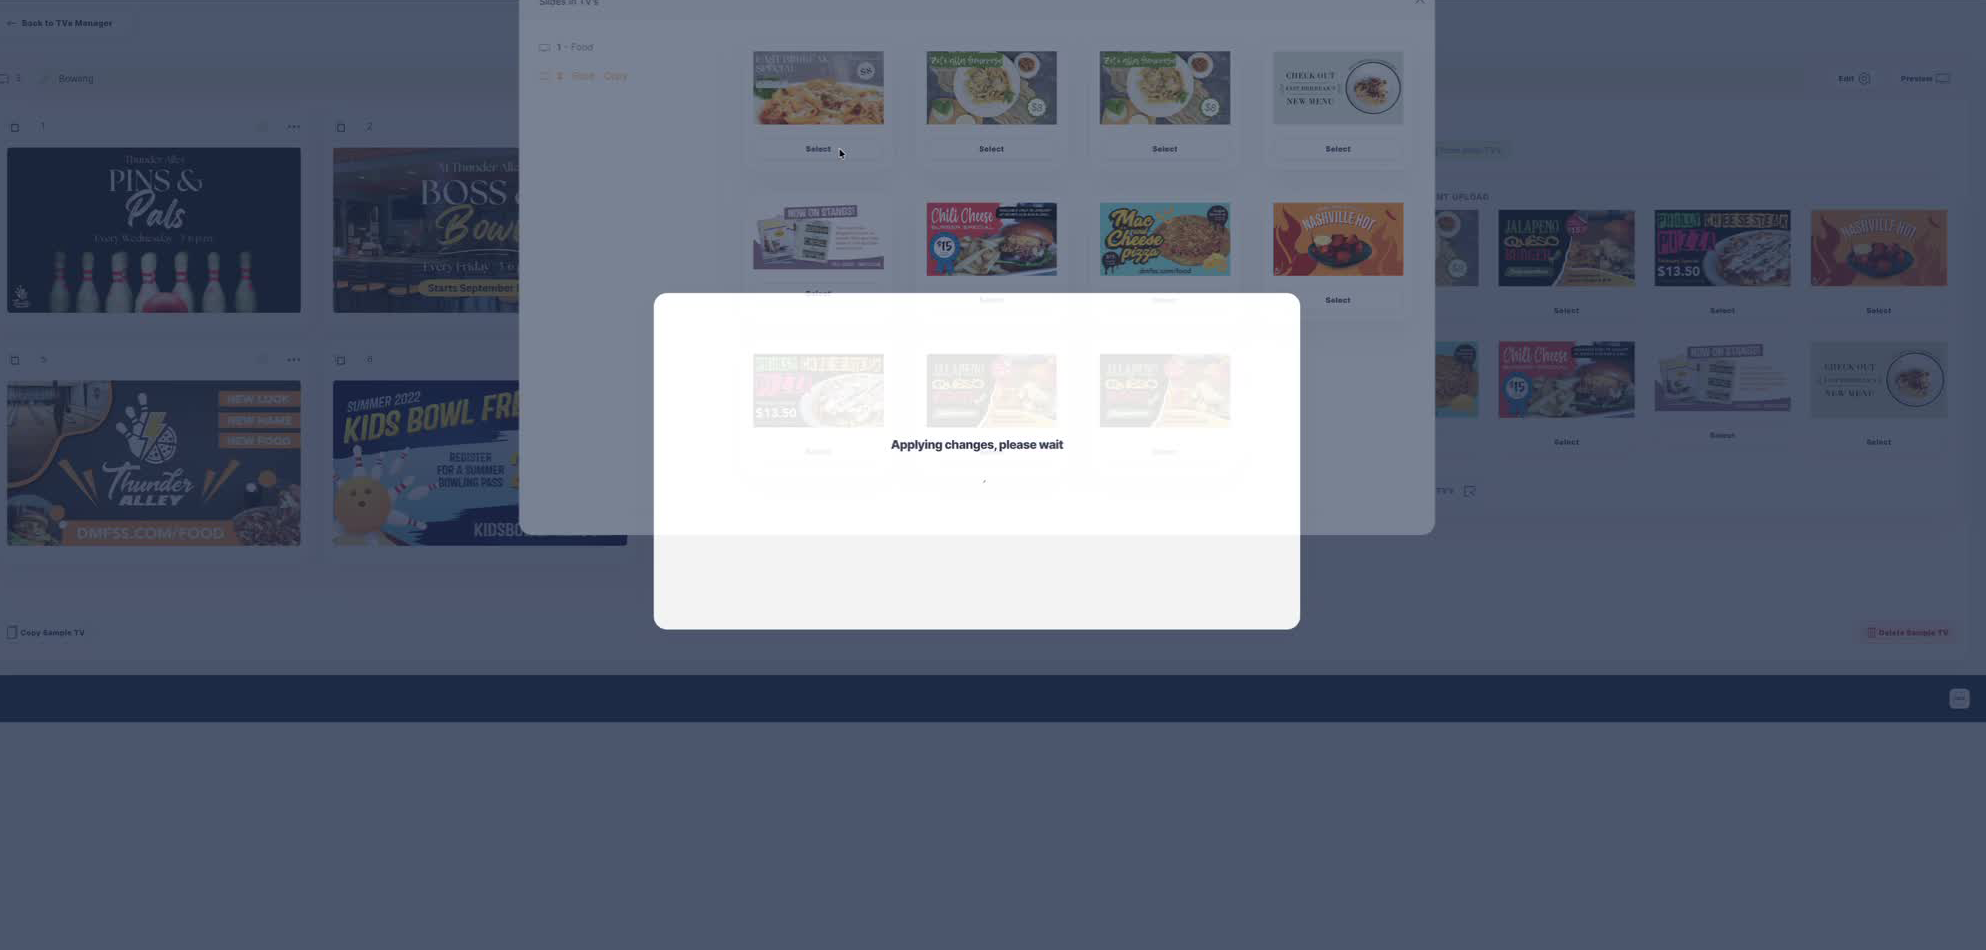
4. Copy slides from other TVs
Slides in TVs window used to select artwork from another TV

Purpose: Reuse approved content without uploading it again.

  1. Open the destination TV in Configure.
  2. In Add New Slide, select From other TVs.
  3. In the Slides in TVs window, choose a source TV in the left column.
  4. Select the required slide.
  5. Repeat for any additional slides, then close the window.
  6. Wait for Applying changes to finish.

Expected result: A copy of each selected slide appears in the destination TV; the source TV remains unchanged.

02 / CONTROL

Configure & verify

Set slide schedules and TV timing, then confirm the public output.

Procedures 5–8
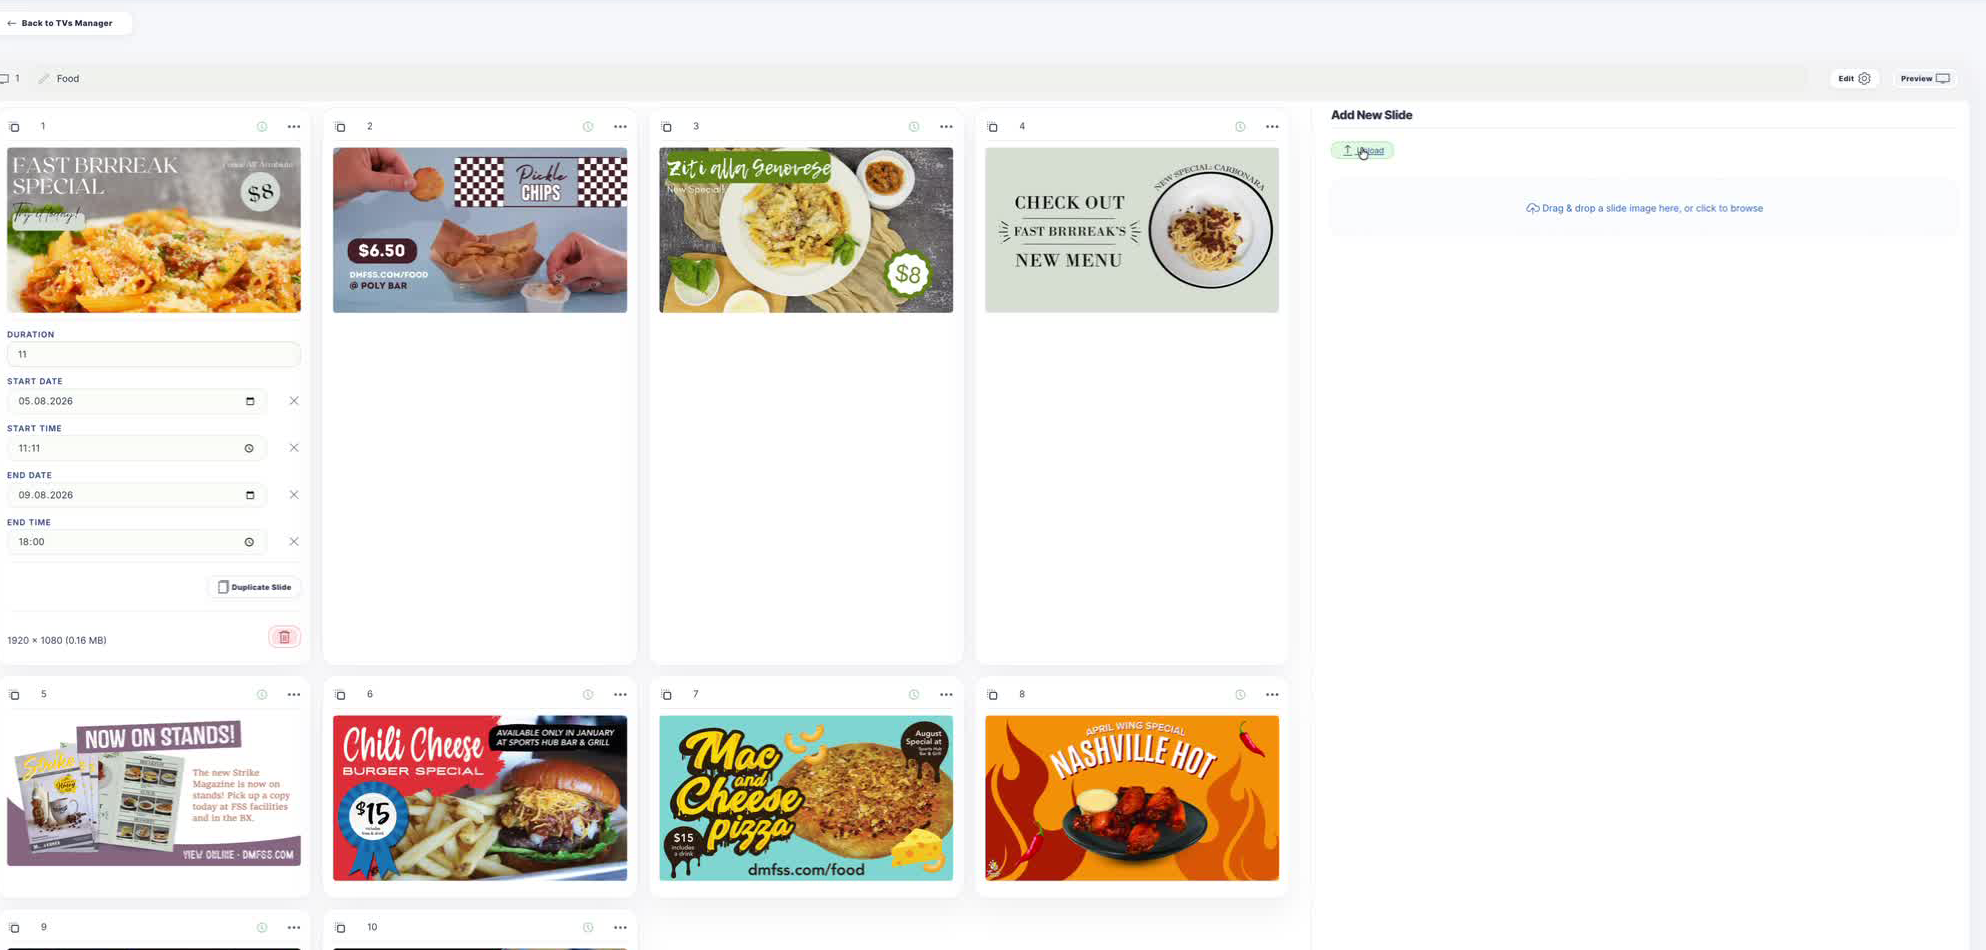
5. Set slide duration and visibility dates
Expanded slide card with duration and start and end schedule fields

Purpose: Control how long one slide displays and when it is eligible to appear.

  1. Select the clock icon on the slide card; its tooltip reads Edit Slide Settings.
  2. Set Duration in seconds.
  3. If the slide is time-limited, set Start Date, Start Time, End Date, and End Time.
  4. Use the X beside a date or time to clear that limit when it is not needed.
  5. Use Duplicate Slide to make a copy, or the red trash button to remove the slide.
  6. Preview the TV and confirm the slide reports the intended visibility state.

Expected result: The slide follows its duration and schedule; outside the scheduled window the preview can report NOT VISIBLE.
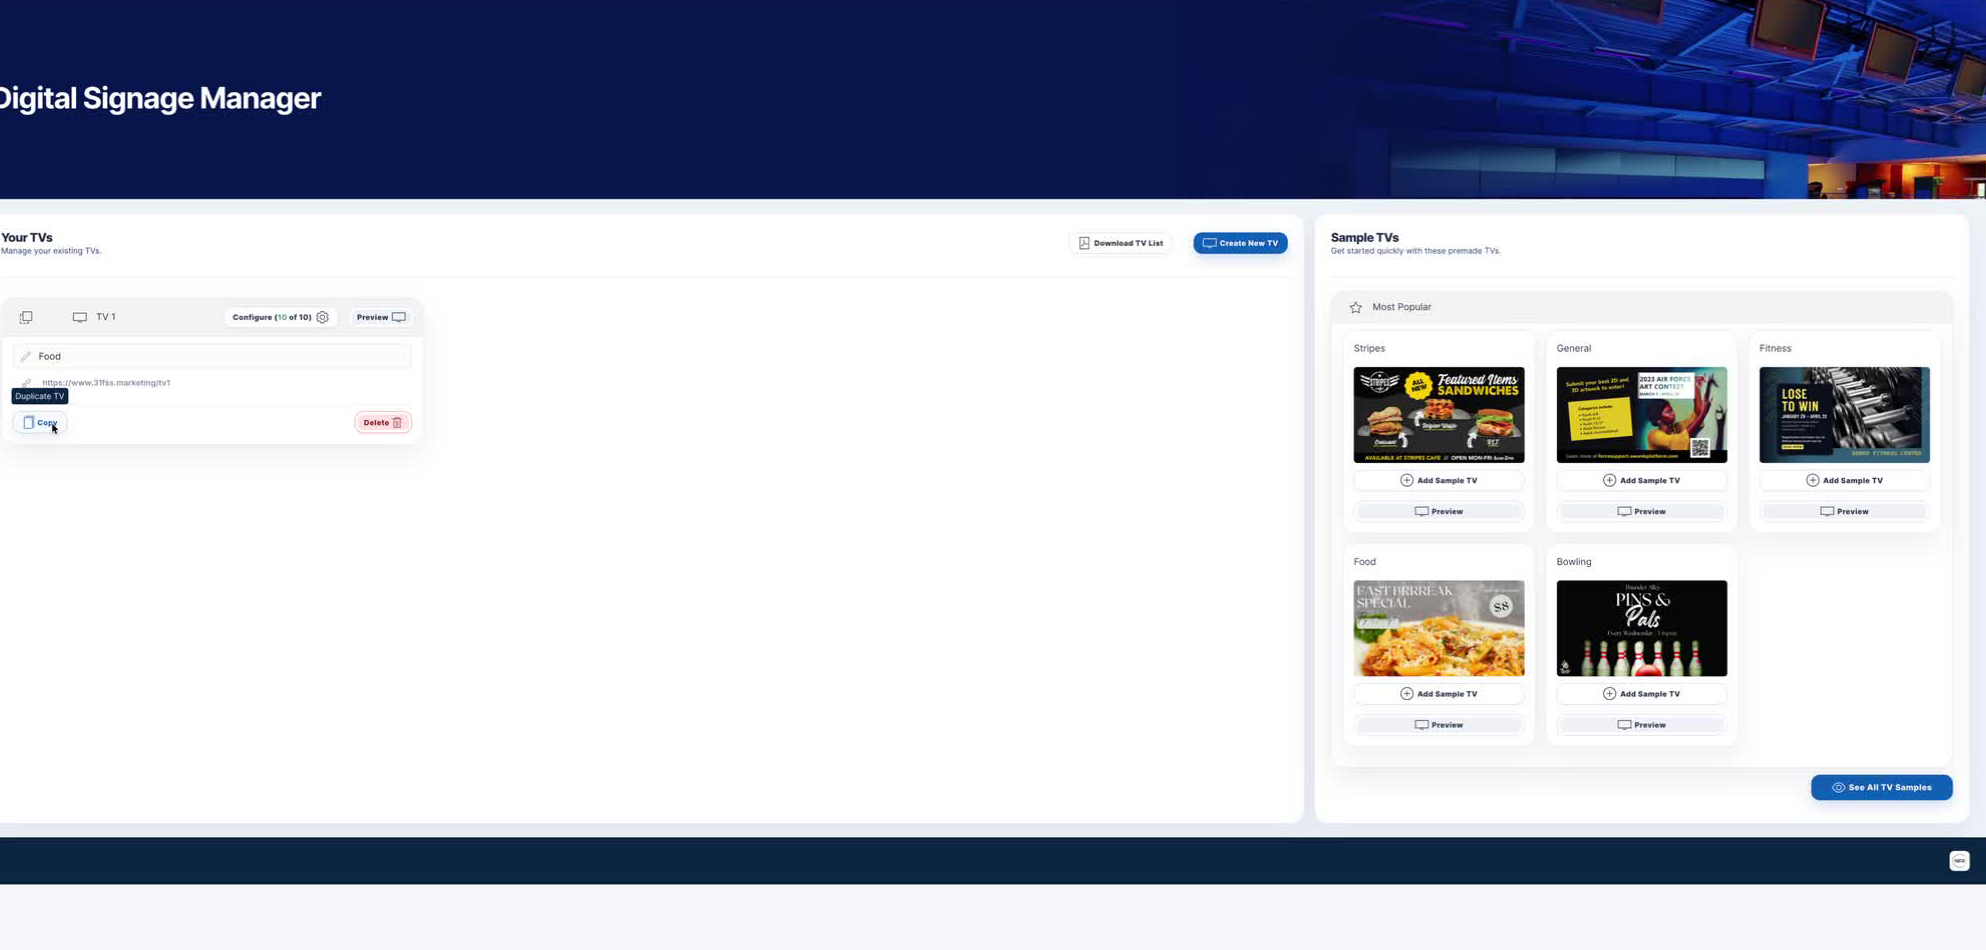
6. Rename a TV
TV Manager card with TV number, editable name, public URL, and management controls
  1. Open the TV card or the slideshow editor.
  2. Select the pencil beside the current name.
  3. Enter a specific, recognizable name.
  4. Wait for the green Saving or Saved message to finish.

Expected result: The new name appears in TV Manager and TV List Overview. The TV number and public URL remain the identifiers to verify.
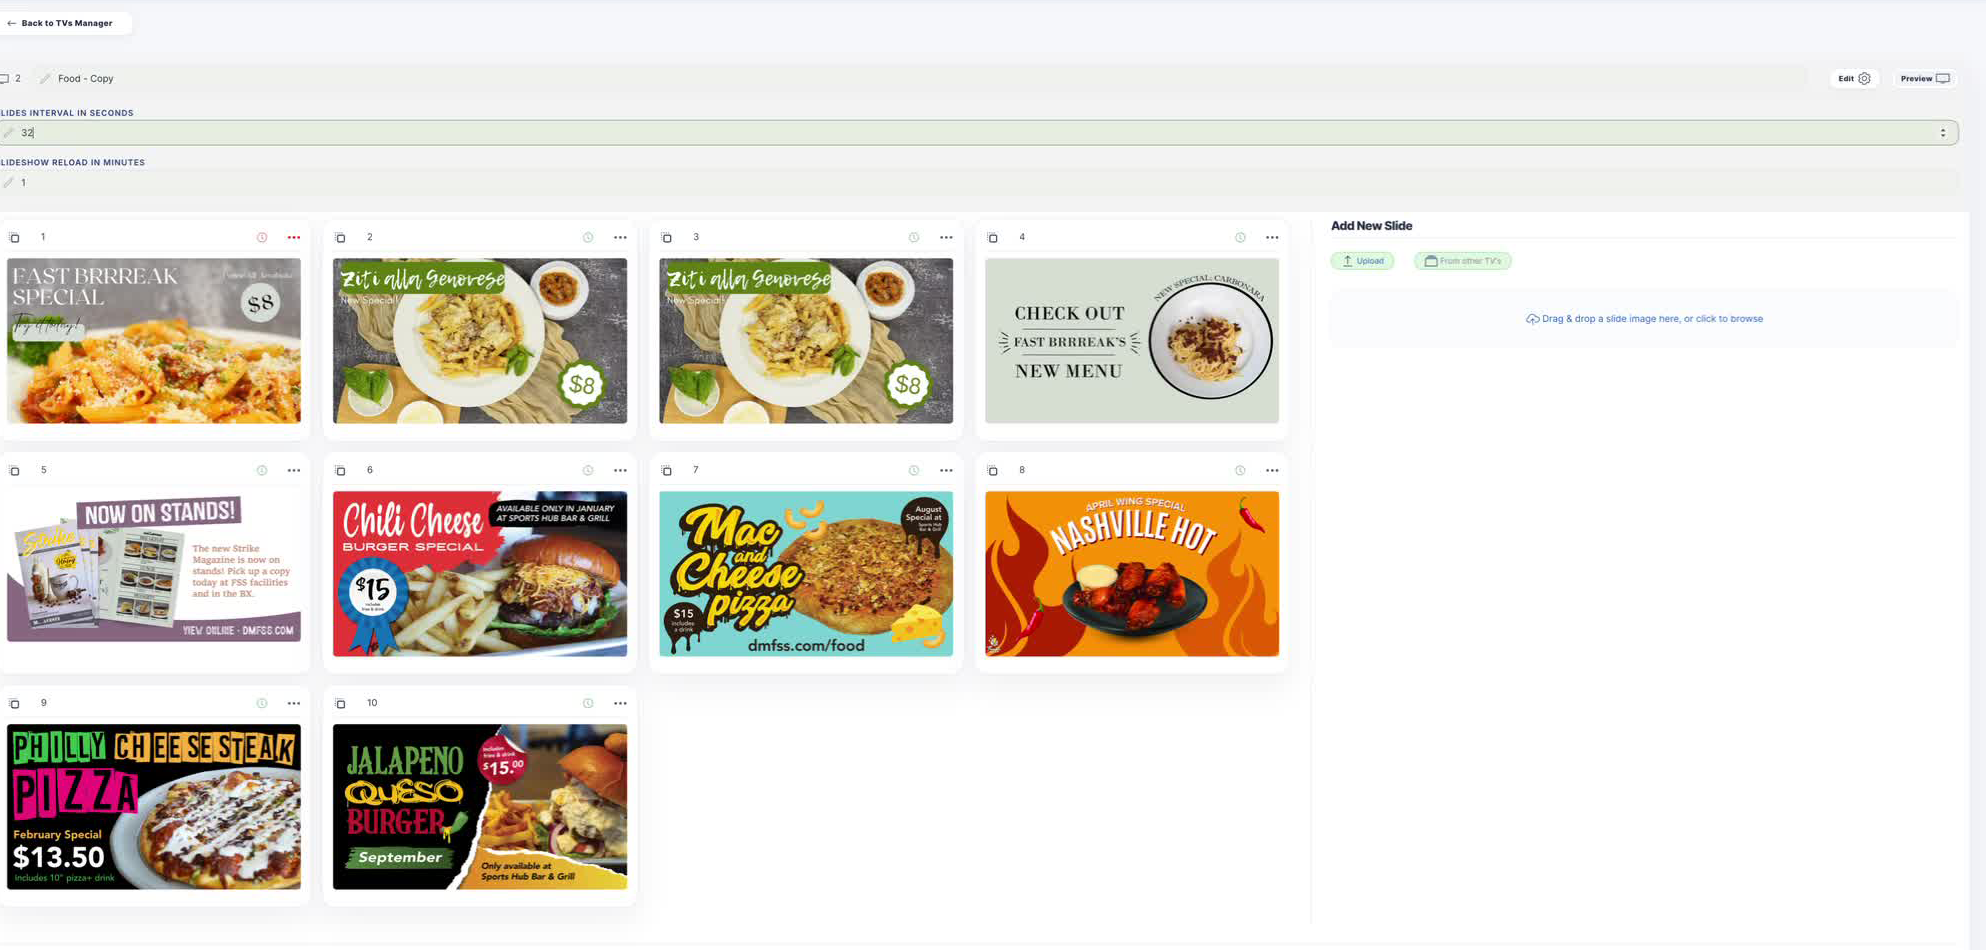
7. Configure TV timing
Slideshow editor showing Slides Interval in seconds and Slideshow Reload in minutes

Purpose: Set overall slide pacing and how often the public player reloads content.

  1. Open the TV in Configure.
  2. Select Edit with the gear icon.
  3. Set Slides Interval in seconds.
  4. Set Slideshow Reload in minutes.
  5. Wait for the saved confirmation.
  6. Preview one full rotation and adjust if messages cannot be read comfortably.

Expected result: Slides advance at the intended pace and the player checks for updates at the configured reload interval.

8. Preview and confirm visibility
Public slideshow preview showing a NOT VISIBLE schedule status
  1. Select Preview from the TV card or editor.
  2. Check the status badge. VISIBLE means the current slide is inside its allowed schedule. NOT VISIBLE means it is outside the displayed start/end window.
  3. Use the arrows or position dots to review the rotation.
  4. Check artwork, sequence, legibility, duration, and scheduled content.
  5. Return to Configure, correct any issue, and preview again.

Expected result: The public-facing slideshow shows the approved content and every scheduled slide has the intended visibility status.

03 / MAINTAIN

Administer safely

Copy, document, or remove TVs without losing track of the public URL.

Procedures 9–11

9. Copy an existing TV
TV Manager showing the Copy control on a TV card
  1. Find the source TV under Your TVs.
  2. Select Copy.
  3. Open the new TV, normally named with - Copy.
  4. Rename it and review every slide, schedule, and timing value.
  5. Preview the new public URL before assigning it to a display.

Expected result: A separate TV is created with its own TV number and public URL. Later changes to the copy do not change the source TV.
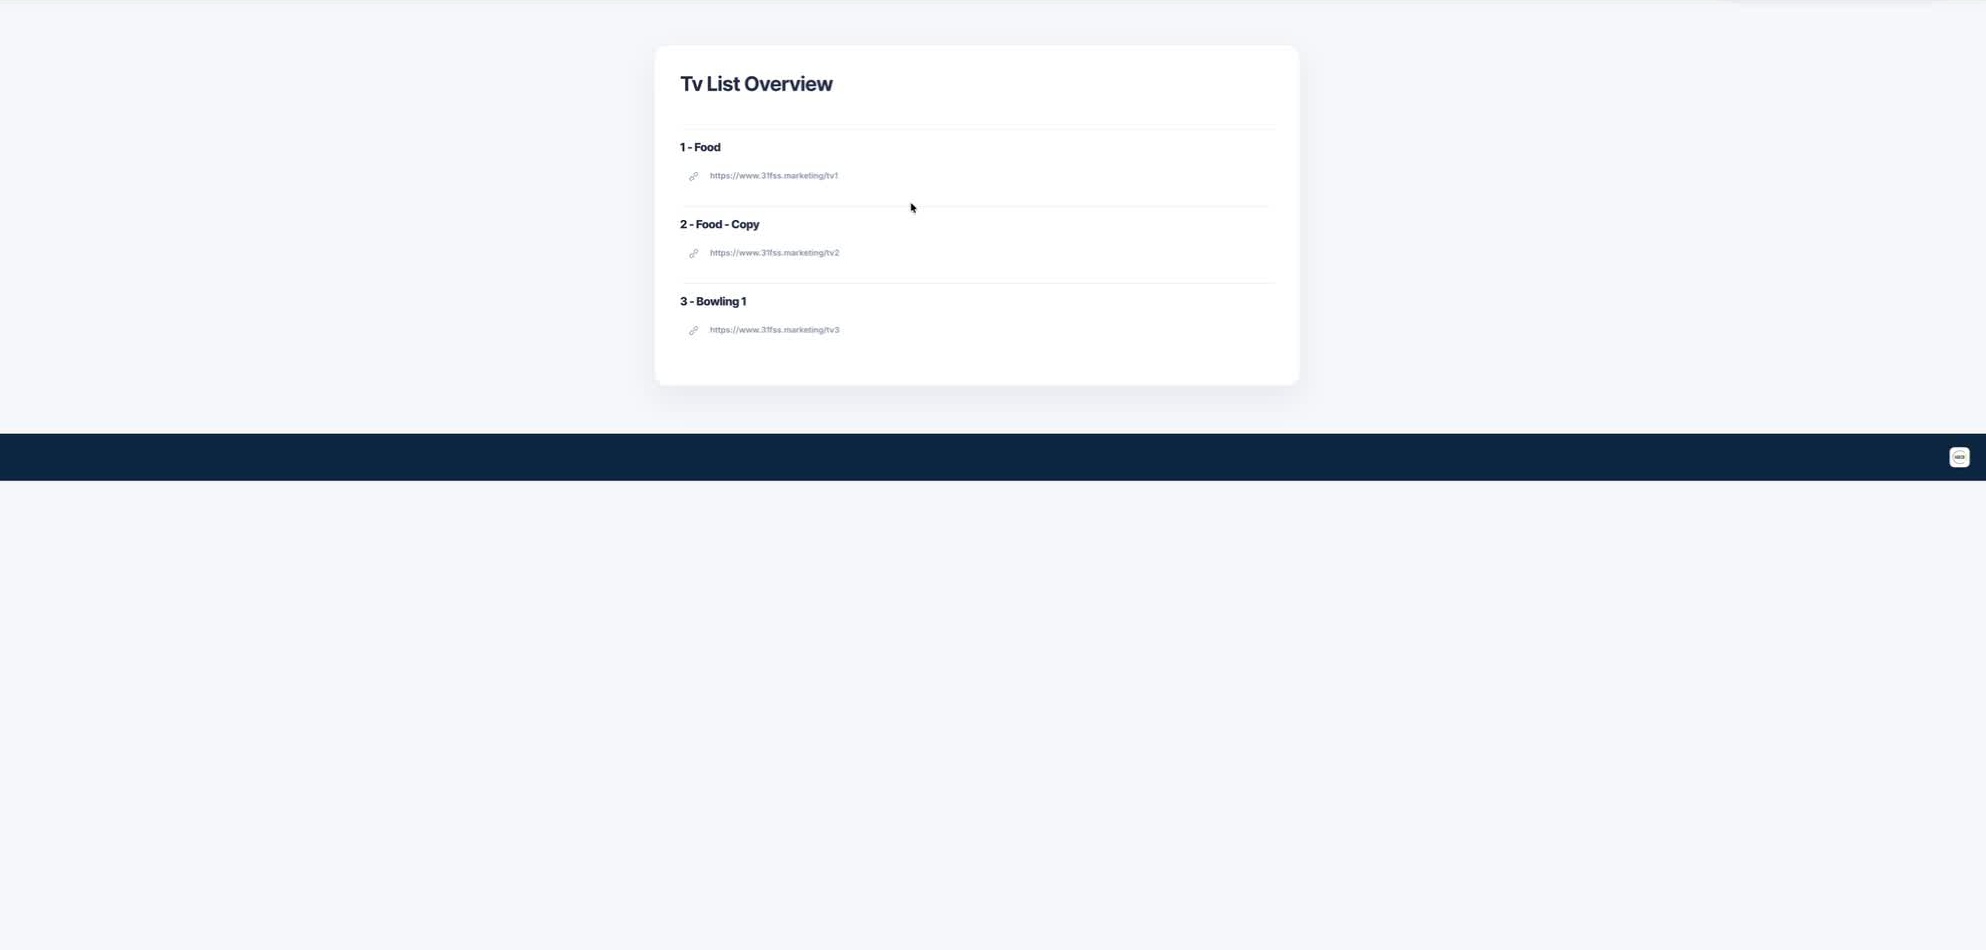
10. Download the TV list
TV List Overview with TV numbers, names, and public URLs
  1. In TV Manager, select Download TV List.
  2. Review TV List Overview.
  3. Confirm each TV number, name, and public URL.
  4. Save the generated PDF for setup, inventory, or handoff.

Expected result: The PDF contains the current TV list and public URLs.
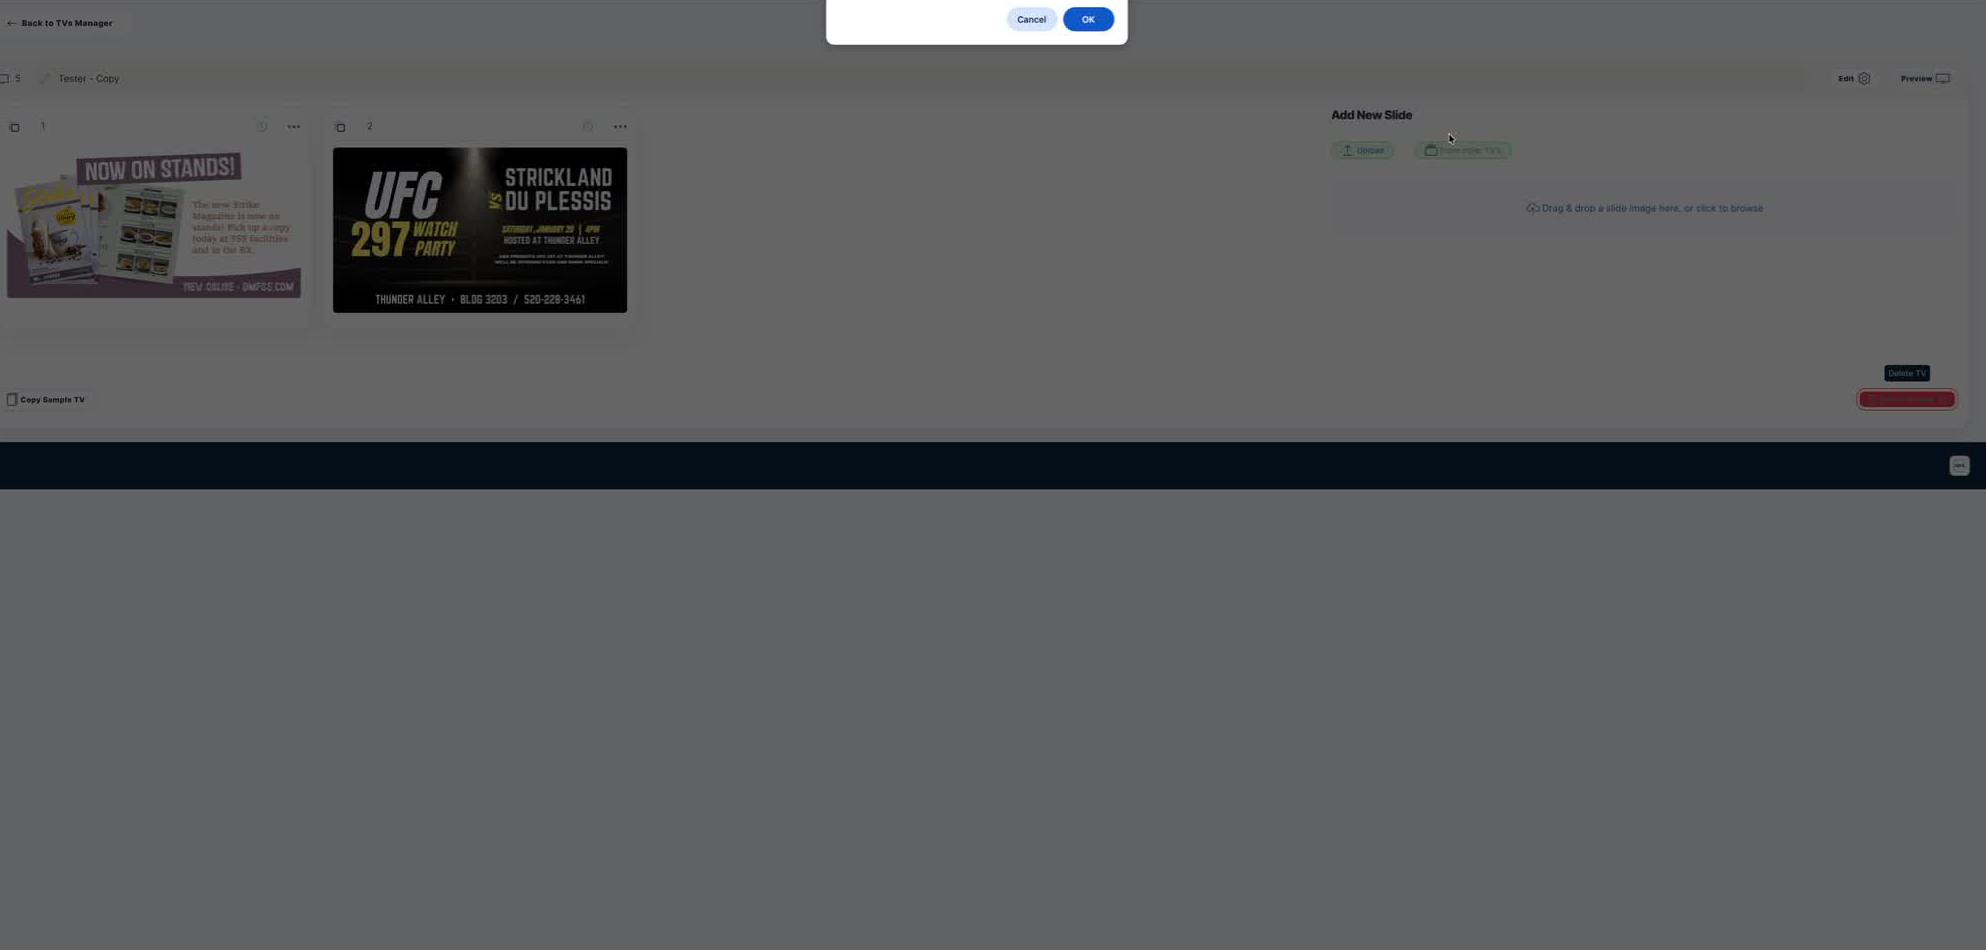
11. Delete a TV
Delete TV confirmation warning that the TV and all related slides will be deleted

Warning: Deleting a TV also deletes all slides related to that TV.

  1. Confirm the TV number, name, public URL, and content one final time.
  2. Select the red Delete control.
  3. Read the confirmation message.
  4. Select Cancel if there is any doubt. Select OK only when deletion is intended.
  5. Return to TV Manager and confirm the TV is gone.

Expected result: The TV and its related slides no longer appear in the manager.

CONTROL MAP

Interface reference

Use this reference to identify the main areas and controls in Digital Signage Manager.

AreaPurposeMain controls
TV Manager
Manage all TVs

Create New TV, Download TV List, TV cards, and Sample TVs.

TV card
Identify and control one TV

TV number, name, public URL, Configure count, Preview, Copy, and Delete.

Sample TVs
Start from approved examples

Category preview, Add Sample TV, Preview, and See All TV Samples.

Slideshow editor
Maintain TV content

Numbered slide cards, Edit gear, Preview, Add New Slide, and Back to TVs Manager.

Slide card
Control one slide

Edit Slide Settings clock, action menu, Duration, schedule, Duplicate Slide, and trash.

Add New Slide
Add or reuse artwork

Upload, drag and drop, recent uploads, and From other TVs.

TV timing
Set playback and refresh

Slides Interval in seconds and Slideshow Reload in minutes.

Public Preview
Verify display output

VISIBLE or NOT VISIBLE badge, schedule details, artwork, arrows, and position dots.

TV List Overview
Reference TVs and public URLs

TV number-name entries and the public URL for each TV; downloadable as PDF.

Timing reference

Three timing controls work together: one on each slide and two at the TV level.

Per slide

Duration

Controls how many seconds the selected slide remains on screen. Open the slide clock to edit it.

TV-level pacing

Slides Interval in seconds

Sets the slideshow's overall interval in seconds. Review individual slide durations and preview a full rotation after changing it.

Content refresh

Slideshow Reload in minutes

Controls how often the public player reloads and checks for updated content. This value is measured in minutes.

Choose readable timing

Simple image-only slides can use shorter durations. Slides containing schedules, prices, instructions, or substantial text need more reading time. Allow the reload interval to pass when testing newly changed content, then preview a complete rotation.

FINAL REVIEW

Before publishing

Complete this quality check whenever you create or update a slideshow.

Success standard

The correct public URL shows approved artwork, every scheduled slide has the intended visibility status, and the complete rotation is readable.

Quality-control checklist

  • The correct TV number, name, and public URL are selected.
  • All images are current, approved, sharp, and correctly oriented.
  • No expired promotions, unintended duplicate slides, or unrelated images remain.
  • Text is readable from the expected viewing distance.
  • Every time-limited slide has the correct start and end dates and times.
  • Preview reports VISIBLE or NOT VISIBLE exactly as intended for scheduled slides.
  • Slide and reload intervals are appropriate.
  • Preview has been checked through one complete rotation.
QUICK DIAGNOSTICS

Quick troubleshooting

Use these checks for common content and playback problems.

First check

Confirm the TV number and public URL before changing content or timing.

Common fixes

The preview is missing an image
  1. Return to Configure and confirm the image appears as a numbered slide card.
  2. Open its slide settings and check the start/end dates and times.
  3. If it is absent, upload it or select it from recent uploads or From other TVs.
  4. Wait for Saved, then preview a complete rotation.
The preview still shows older content
  1. Confirm that you edited the correct TV number and URL.
  2. Wait for Saved or Applying changes to finish.
  3. Allow the configured Slideshow Reload interval in minutes to pass.
  4. Reopen Preview. If content is still incorrect, compare the display URL with the URL on the intended TV card.
A slide reports NOT VISIBLE
  1. Read the start and end values shown in Preview.
  2. Return to Configure and open the slide clock.
  3. Correct the date, time, and time-of-day values, or clear limits that are not needed.
  4. Wait for Saved and preview again.

Note: NOT VISIBLE is expected when a scheduled slide is outside its approved window.

Slides advance too quickly or too slowly
  1. Open the slideshow settings gear.
  2. Review Slides Interval in seconds.
  3. Adjust the value.
  4. Preview one complete rotation and verify that every message can be read comfortably.
The display shows the wrong slideshow
  1. Identify the intended TV number and name in TV Manager.
  2. Compare its public URL with the URL used by the display.
  3. Open Preview for the intended TV and confirm its content.
  4. Update the display only after the TV number, name, URL, and preview all match.